Installation
Step 1: Download Plugin
Using CURL or another HTTP software, download our plugin from Amazon AWS and into a TMP directory on your machine.
curl https://ecomm-plugins-236771403467-stg.s3.us-west-2.amazonaws.com/magento-plugin-1.6.1-b.zip --output "/tmp/chargeafter"
Step 2: Unzip Plugin
Once you have downloaded the plugin above, you will need to extract that zip file into the appropriate folder on your web server.
- Plugin Installation Location
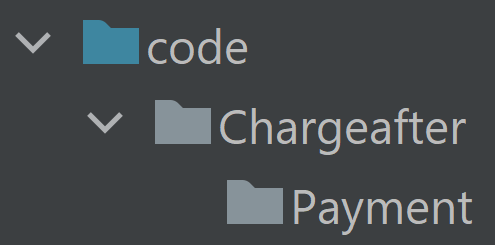
- /app/code

Unzip the downloaded file into the app/code directory. This should yield a new directory:
- /app/code/Chargeafter
- Inside of the Chargeafter directory, you should have a subdirectory:
- Payment
- Inside of the Chargeafter directory, you should have a subdirectory:
Step 3: Enable Plugin
To double check that Magento 2 recognizes the plugin is in the appropriate location, use the command below from the root directory.
./bin/magento module:status
Since we have not yet enabled Chargeafter, it might appear in the disabled section for now, as seen below:

In order to enable Chargeafter, run the following command from the same location as before:
Note that if Chargeafter was already enabled, you will not have to complete this step.
./bin/magento module:enable Chargeafter_Payment
You should receive a confirmation:

Step 4: Integrate the plugin
To integrate the plugin into your Magento 2 instance, run the following command:
./bin/magento setup:upgrade
This command will inserts the 'Non Leasable' flag into the Magento 2 database to make it available for use.
Run the following command to process the module's dependency-injected classes:
./bin/magento setup:di:compile
Step 5: Clear Cache
Now, we should clear the cache and compiled code by using the following commands:
./bin/magento cache:clean
./bin/magento cache:flush
You can also perform this step in the Magento 2 admin area under System >> Cache Management.
Caching
When clearing the cache, make sure to log out and back in to ensure the clear is properly complete.
Unusual Formatting on Rendered Site after Cache Clear
Depending on how your storefront is set up, you may notice some strange formatting (or lack thereof) following completion of the actions listed here in step 5. Running the following command often resolves the issue:
./bin/magento setup:static-content:deploy -f
Step 6: Configure the Plugin
After the plugin is installed you will need to add your Merchant Credentials to the Payment Methods screen in Magento.
- Select "Configuration" under "Stores" in the left sidebar.
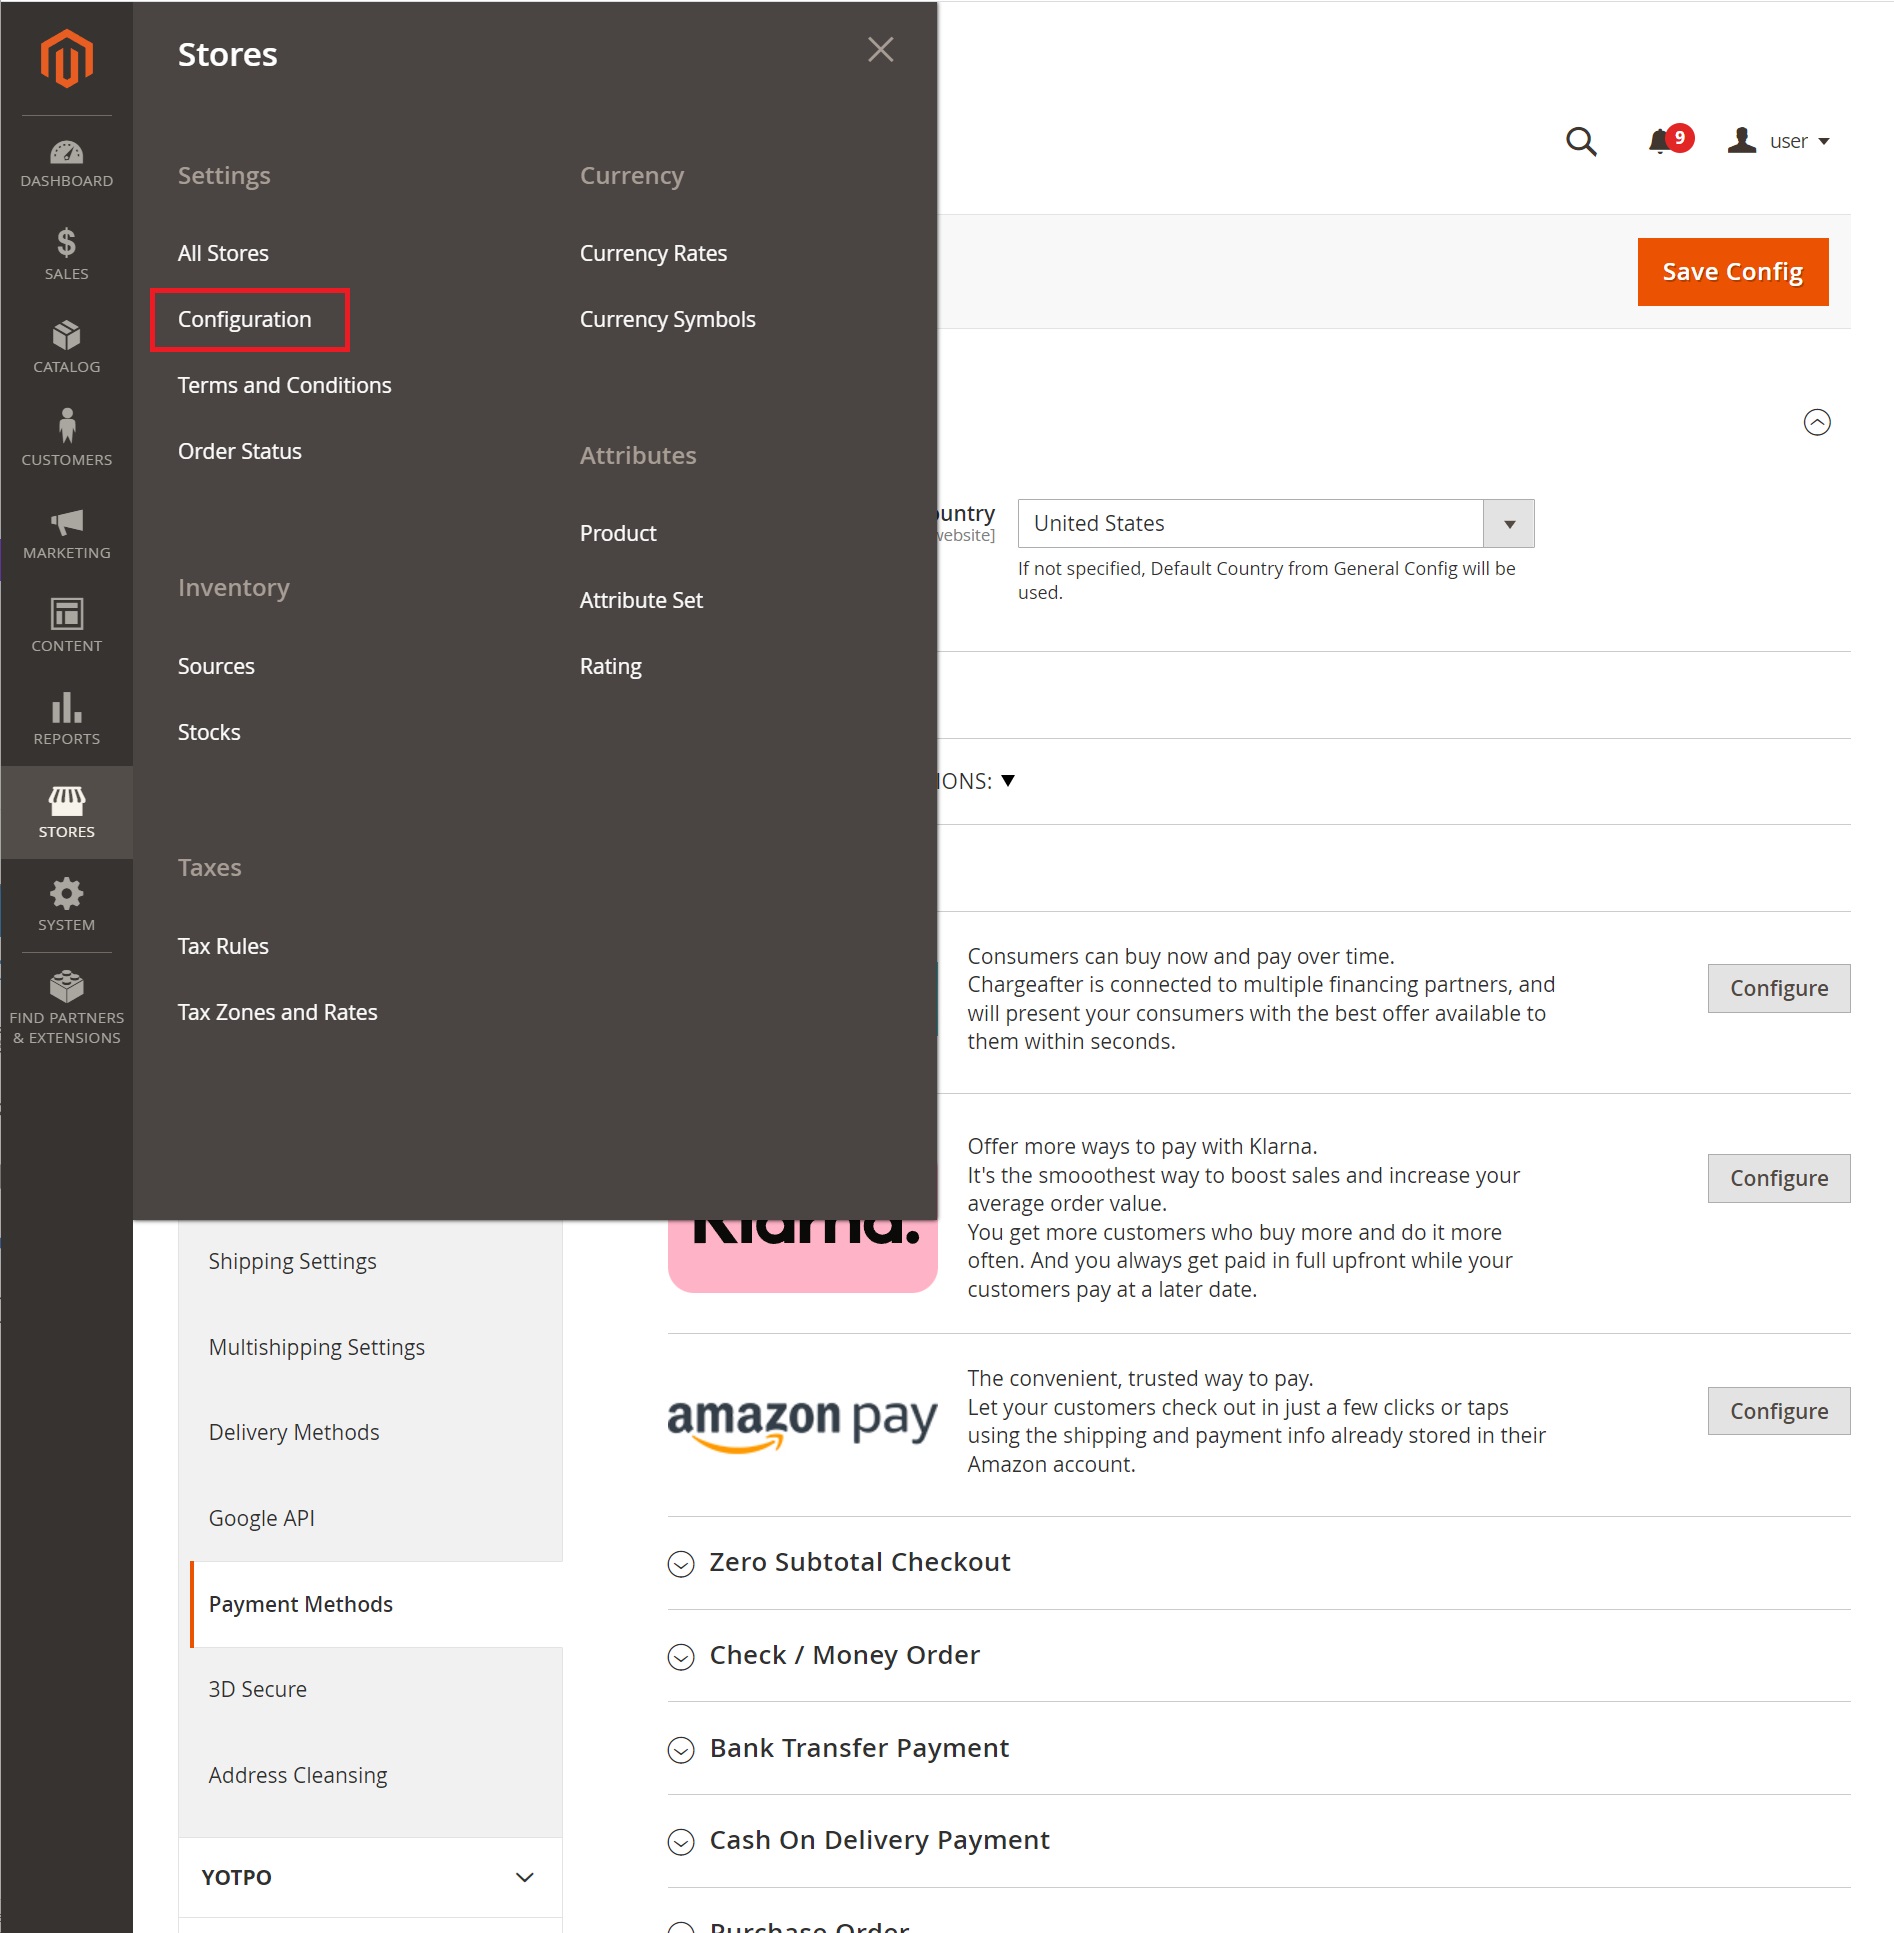
- Select "Payment Methods" in the sub-menu, then choose "Configure" next to ChargeAfter.

- Set the following values:
- Set the Title to "Progressive Leasing"
- Set your available countries to "United States"
- Set the Billing address equals shipping to "Yes"
- Add API Keys to the proper sections.
- Set your Transaction Type:
- Capture will automatically complete and invoice new orders
- Authorization will require manual order confirmation using Magento
- Enable the solution
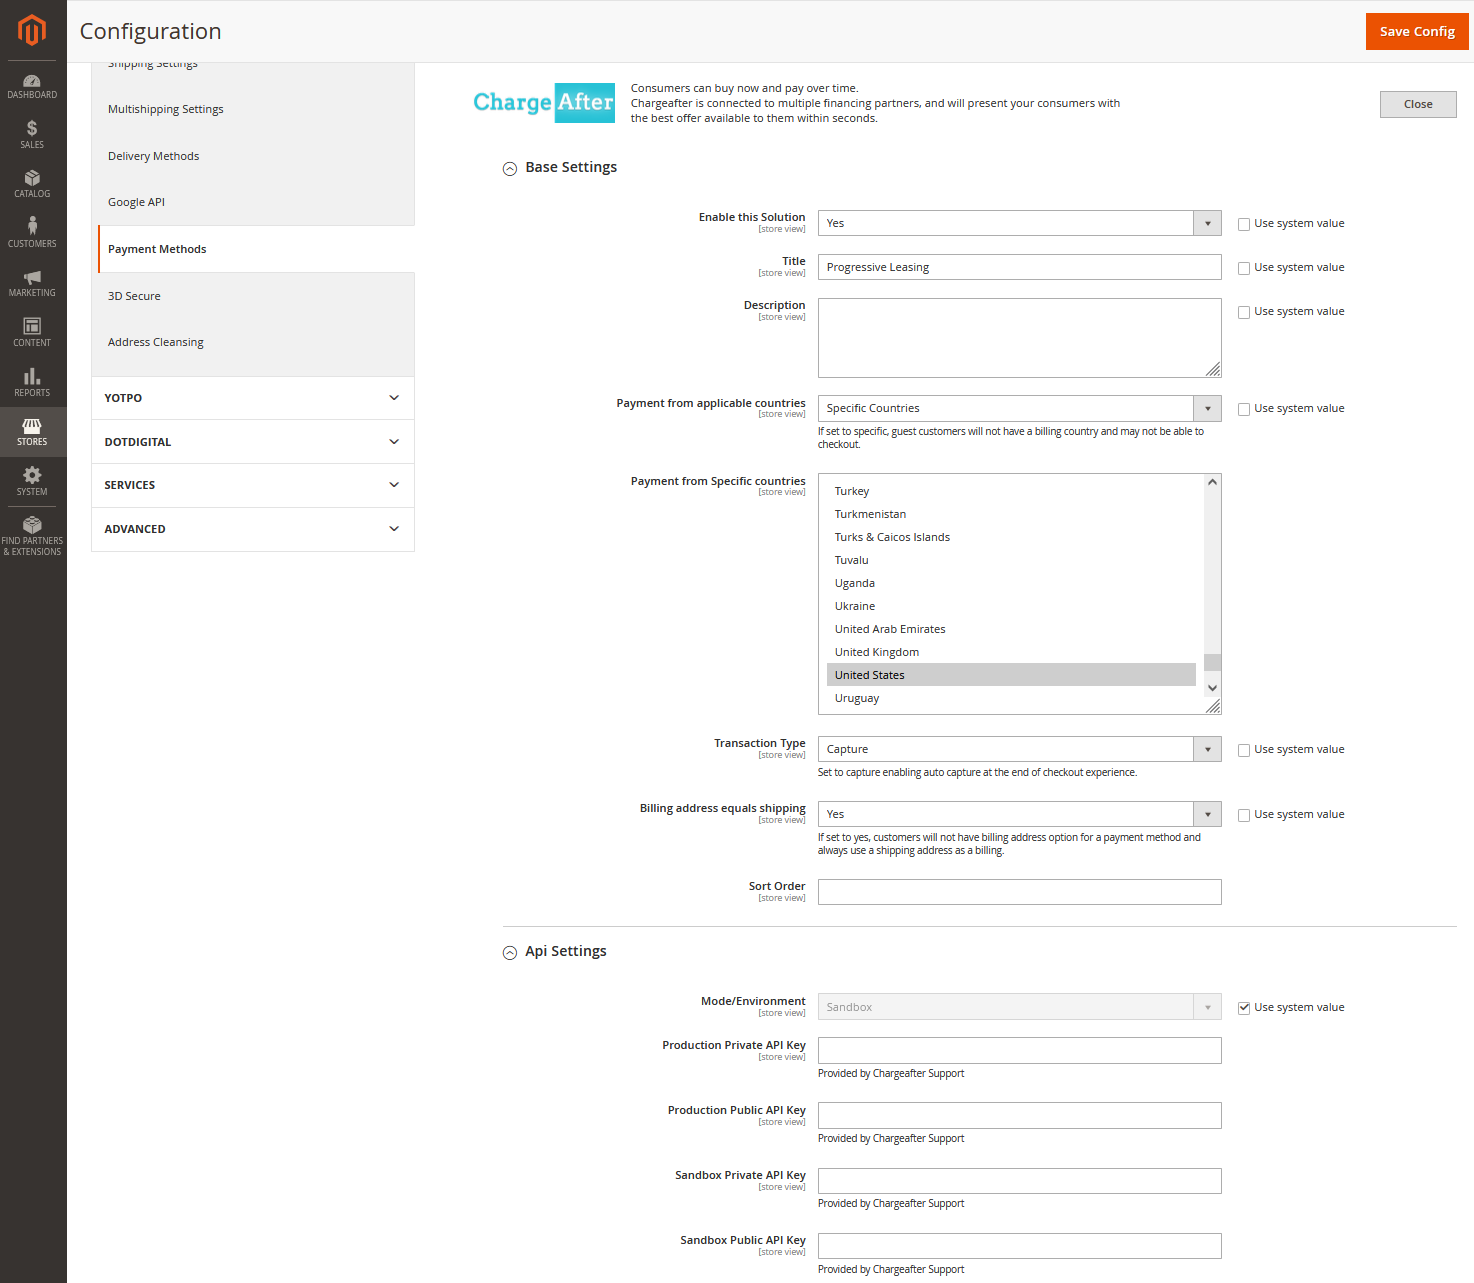
- Click on "Save Config"
- Test the solution.
Updated over 2 years ago